Installing Home Assistant OS in KVM on Raspberry Pi 5

Running Home Assistant directly on a Raspberry Pi is the default, but what if you want KVM virtualization on the same Pi 5? Virtualizing HAOS gives you snapshots, easy backup, and the ability to run other services alongside it. This guide walks through the full setup — from installing libvirt and KVM on a Pi 5 to getting Home Assistant accessible on your LAN.
Technology Stack:
| Layer | Component |
|---|---|
| Hardware | Raspberry Pi 5 (ARM64, hardware virtualization) |
| Host OS | Raspberry Pi OS 64-bit (Bookworm or newer) |
| Hypervisor | QEMU/KVM with libvirt |
| Management | Cockpit web UI (optional) or virsh CLI |
| Guest | Home Assistant OS as an isolated VM |
| Network | Direct ethernet bridge (VM appears as native LAN device) |
Prerequisites
- Raspberry Pi 5 running Raspberry Pi OS 64-bit (Bookworm or newer recommended)
- At least 4 GB RAM (8 GB strongly recommended)
- Familiarity with SSH and the Linux command line
Step 1: Install Required Packages
Install libvirt, KVM, bridge-utils, and virt-install:
sudo apt install -y libvirt-daemon-system libvirt-clients bridge-utils virtinst
Add and configure the system user:
sudo groupadd --system libvirt-qemu
sudo useradd --system -g libvirt-qemu -G kvm -s /sbin/nologin -d / -c "Libvirt QEMU user" libvirt-qemu
sudo systemctl restart libvirtd
sudo usermod -aG libvirt,kvm $(whoami)
newgrp libvirt
Note:
$(whoami)expands to your current username. Log out and back in for the group changes to take effect.
Check that the libvirt service is running:
systemctl status libvirtd
Optionally, install Cockpit with the virtualization plugin for web-based VM management:
sudo apt install -y cockpit cockpit-machines
sudo systemctl enable --now cockpit.socket
# Access in browser: https://<rpi5-ip>:9090/
Step 2: Configure the Default Network
Start and enable the default libvirt network (required for VM networking):
sudo virsh net-start default
sudo virsh net-autostart default
Step 3: Download HAOS QCOW2 Image
Note: Version 16.2 was current at the time of writing. Check the HAOS releases page for the latest version and update the URL accordingly.
Download the HAOS image for aarch64 (ARM 64-bit, generic):
wget https://github.com/home-assistant/operating-system/releases/download/16.2/haos_generic-aarch64-16.2.qcow2.xz
unxz haos_generic-aarch64-16.2.qcow2.xz
Optionally, adjust permissions if needed:
sudo chmod o+x /home/youruser /home/youruser/haos
Step 4: Expand the Disk Image
Increase the QCOW2 image size for more storage (optional but recommended):
sudo qemu-img resize haos_generic-aarch64-16.2.qcow2 +32G
Step 5: Create and Run the Virtual Machine
This is the key step — using virt-install to create and launch the HAOS VM.
sudo virt-install \
--name haos \
--description "Home Assistant OS" \
--os-variant=generic \
--ram=6144 \
--vcpus=2 \
--disk haos_generic-aarch64-16.2.qcow2,bus=scsi \
--controller type=scsi,model=virtio-scsi \
--import \
--graphics none \
--noautoconsole \
--network network=default,model=virtio,mac=52:54:00:fa:72:01 \
--network direct,source=eth0,source_mode=bridge,model=virtio,mac=52:54:00:4a:19:02 \
--boot uefi,firmware.feature0.name=enrolled-keys,firmware.feature0.enabled=no,firmware.feature1.name=secure-boot,firmware.feature1.enabled=no
| Parameter | Purpose |
|---|---|
--name haos | VM name |
--ram=6144 | 6 GB RAM allocated (adjust as needed) |
--vcpus=2 | 2 virtual CPUs |
--disk ...bus=scsi | QCOW2 image with SCSI bus for performance |
--controller type=scsi,model=virtio-scsi | VirtIO SCSI controller for disk I/O |
--import | Import existing disk image (no install ISO) |
--graphics none | Headless — no graphical console |
--noautoconsole | Do not auto-connect to console after start |
--network network=default | NAT network for Internet access |
--network direct,source=eth0,source_mode=bridge | Bridged interface — VM appears directly on LAN |
--boot uefi,secure-boot disabled | UEFI firmware with secure boot disabled (required for HAOS) |
Note: On newer Raspberry Pi OS installations, the ethernet interface may be named
end0instead ofeth0. Check withip linkand adjust the--network direct,source=...parameter accordingly. The MAC addresses in the example are arbitrary — you can omitmac=to let libvirt assign them automatically.
Step 6: Enable Autostart
Make sure the HAOS VM starts automatically on boot:
sudo virsh autostart haos
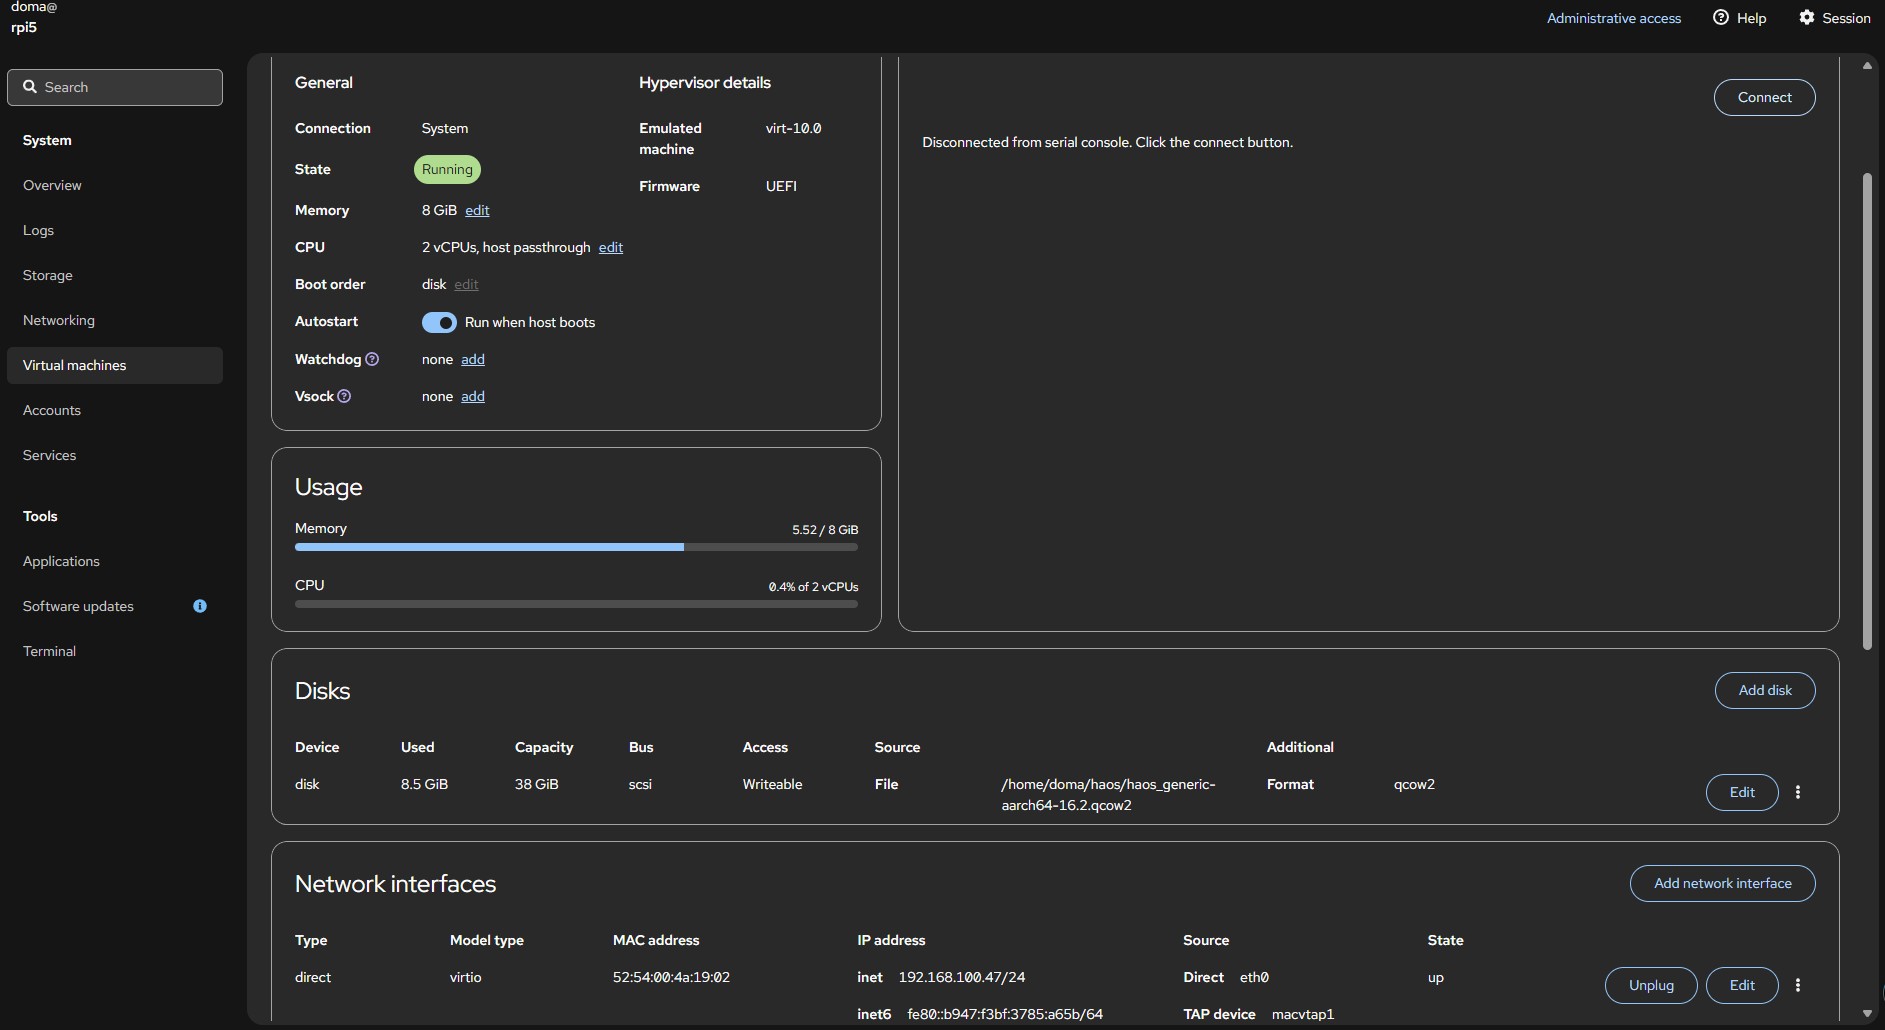
Step 7: Access Home Assistant on Your Network
The VM should now be running. From any device on your LAN, navigate to:
http://homeassistant.local:8123
Accessing from the Raspberry Pi 5 Host
Important: If you try to access Home Assistant directly from the Pi 5 host (the machine running the VM), you may encounter connectivity issues. The VM uses a direct bridge to
eth0, which puts it on the same physical network segment as the host, and the host often cannot route to the VM’s IP through the normal path.Workaround: If you need to access Home Assistant from the Pi 5 host itself:
- SSH tunnel:
ssh -L 8123:homeassistant.local:8123 user@rpi5- Access via the default NAT network (
virbr0) if you configured a second network interface- Use another device on your network to manage Home Assistant
For most users, accessing Home Assistant from other devices on the network works perfectly with the bridged setup.
When you access Home Assistant from your browser, you’ll see the onboarding screen:

Follow the guided setup to create your account, configure integrations, and start building automations.
Troubleshooting and Tips
- If you encounter issues with network or UEFI, double-check firmware settings and ensure you are using non-secure-boot firmware on ARM
- Management via Cockpit (
https://rpi5:9090/) is recommended for visual control - Make sure your user is in the
libvirtandkvmgroups for VM management permissions - Monitor the VM’s resource use and logs:
sudo virsh console haos
References
- Official HAOS KVM Install Docs
- Community thread: Installing HA OS 12.2 in KVM on Raspberry Pi 5
- Virt-install Documentation
- Cockpit Project
From here you can configure integrations, add-ons, and automations inside Home Assistant. If you later need to pass through a Zigbee dongle or USB device, see the companion post on USB passthrough for Zigbee on HAOS KVM.