

Programming ATtiny micro-controller is quite easy if you have all the needed information in one place. That is the reason to put all needed files, hints in one post so next time I will need it, there is no need to google it again from various sources. At the same time I hope, this post will be useful also to someone else trying to program ATtiny13A.
Wiring Arduino Uno with ATtiny13A
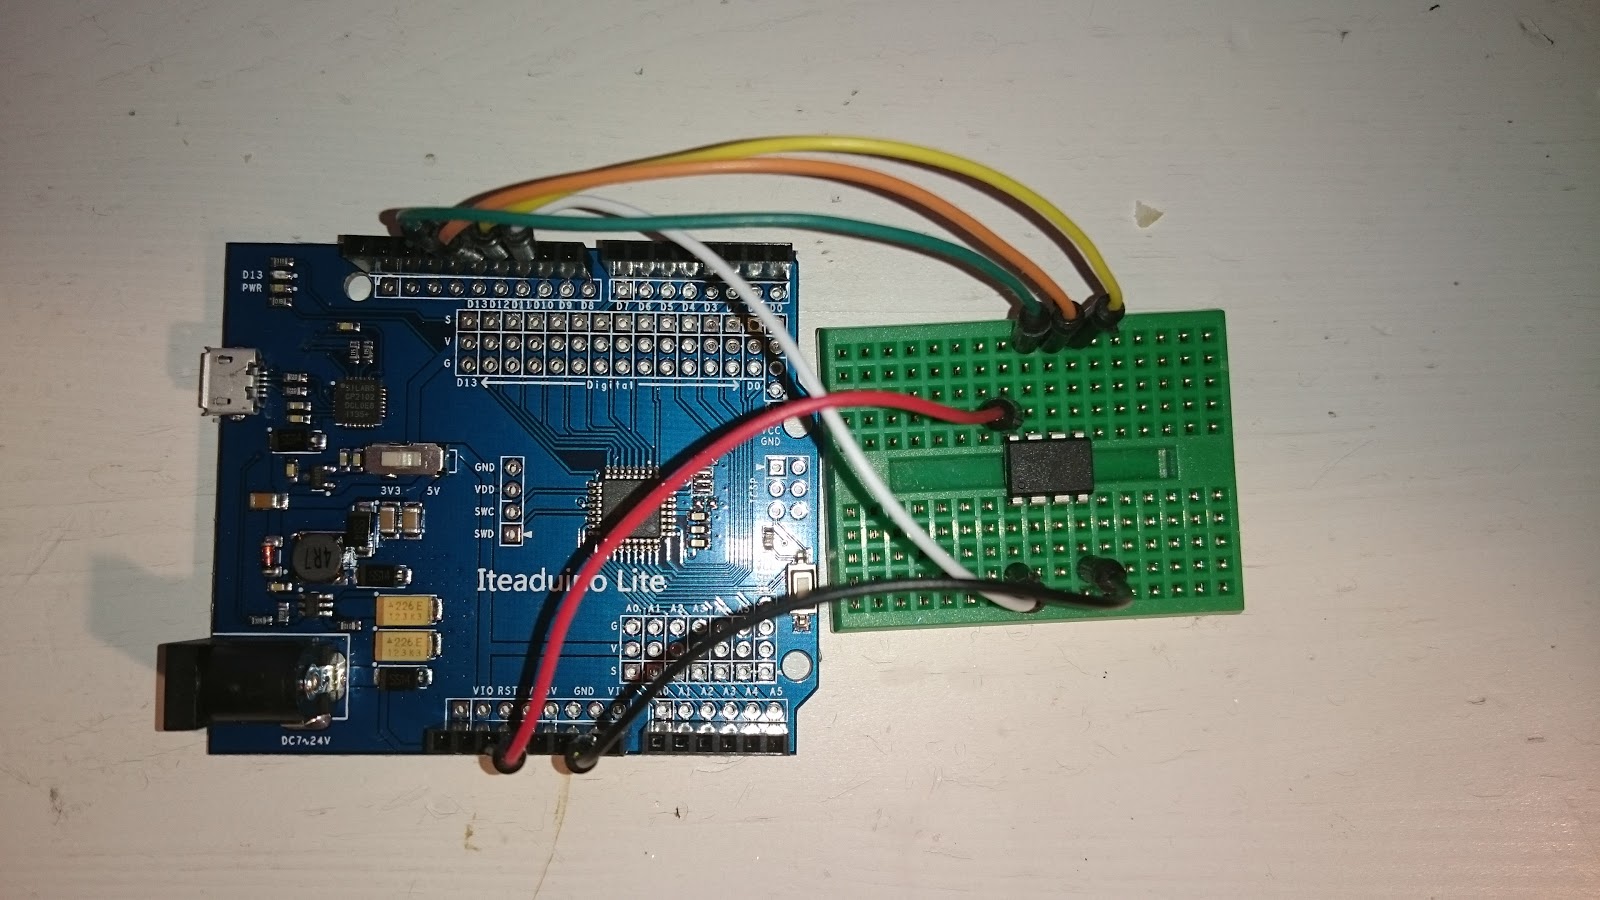
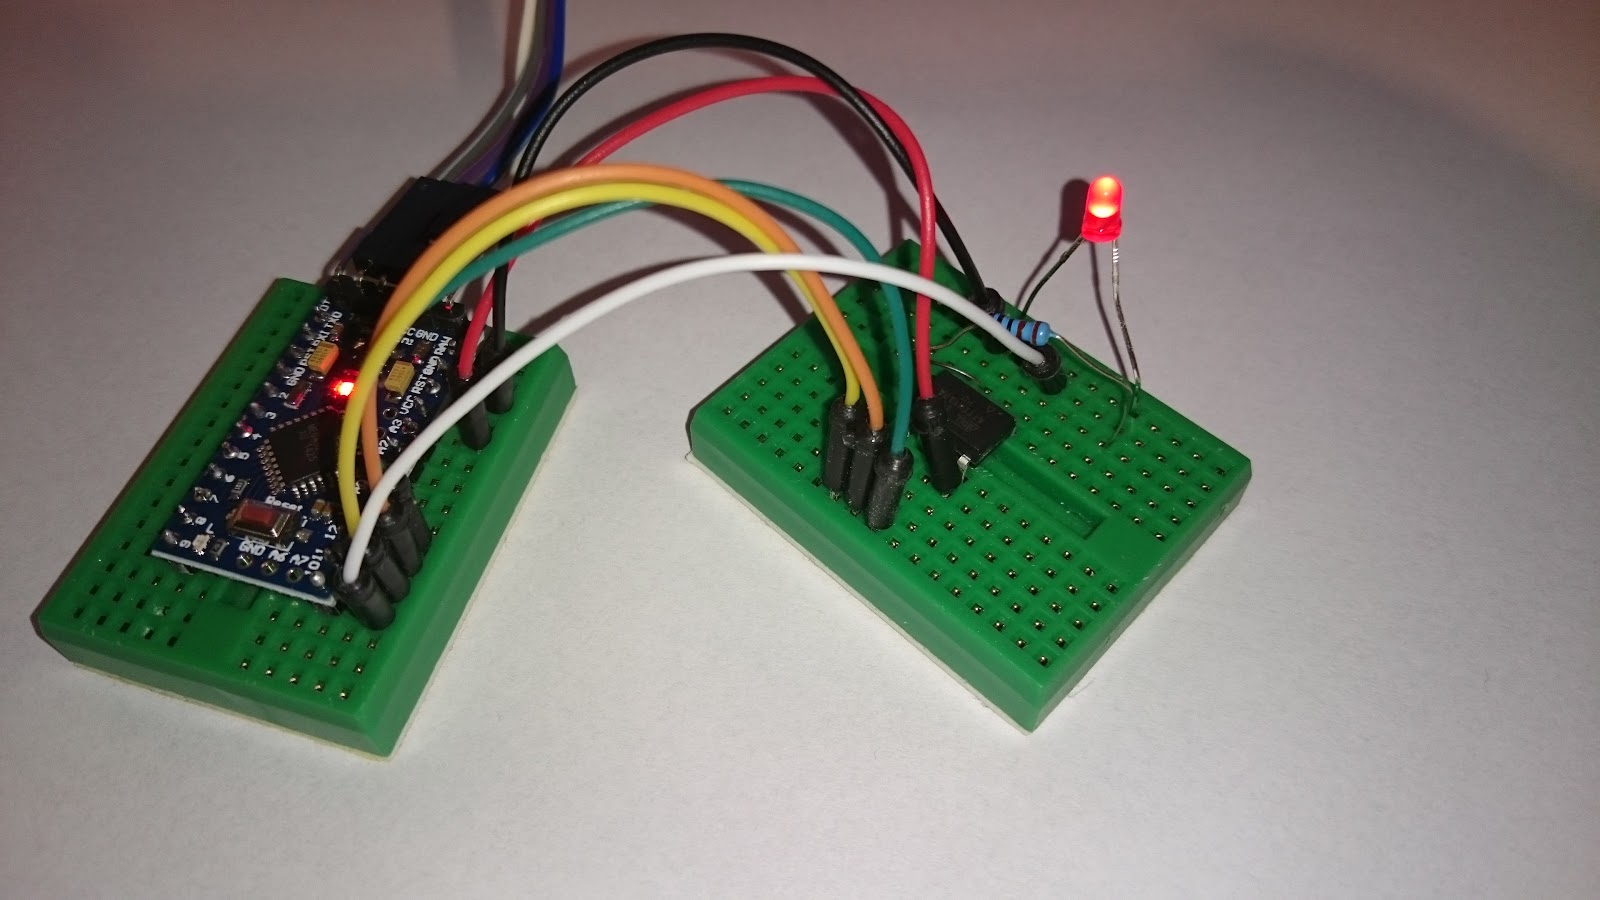
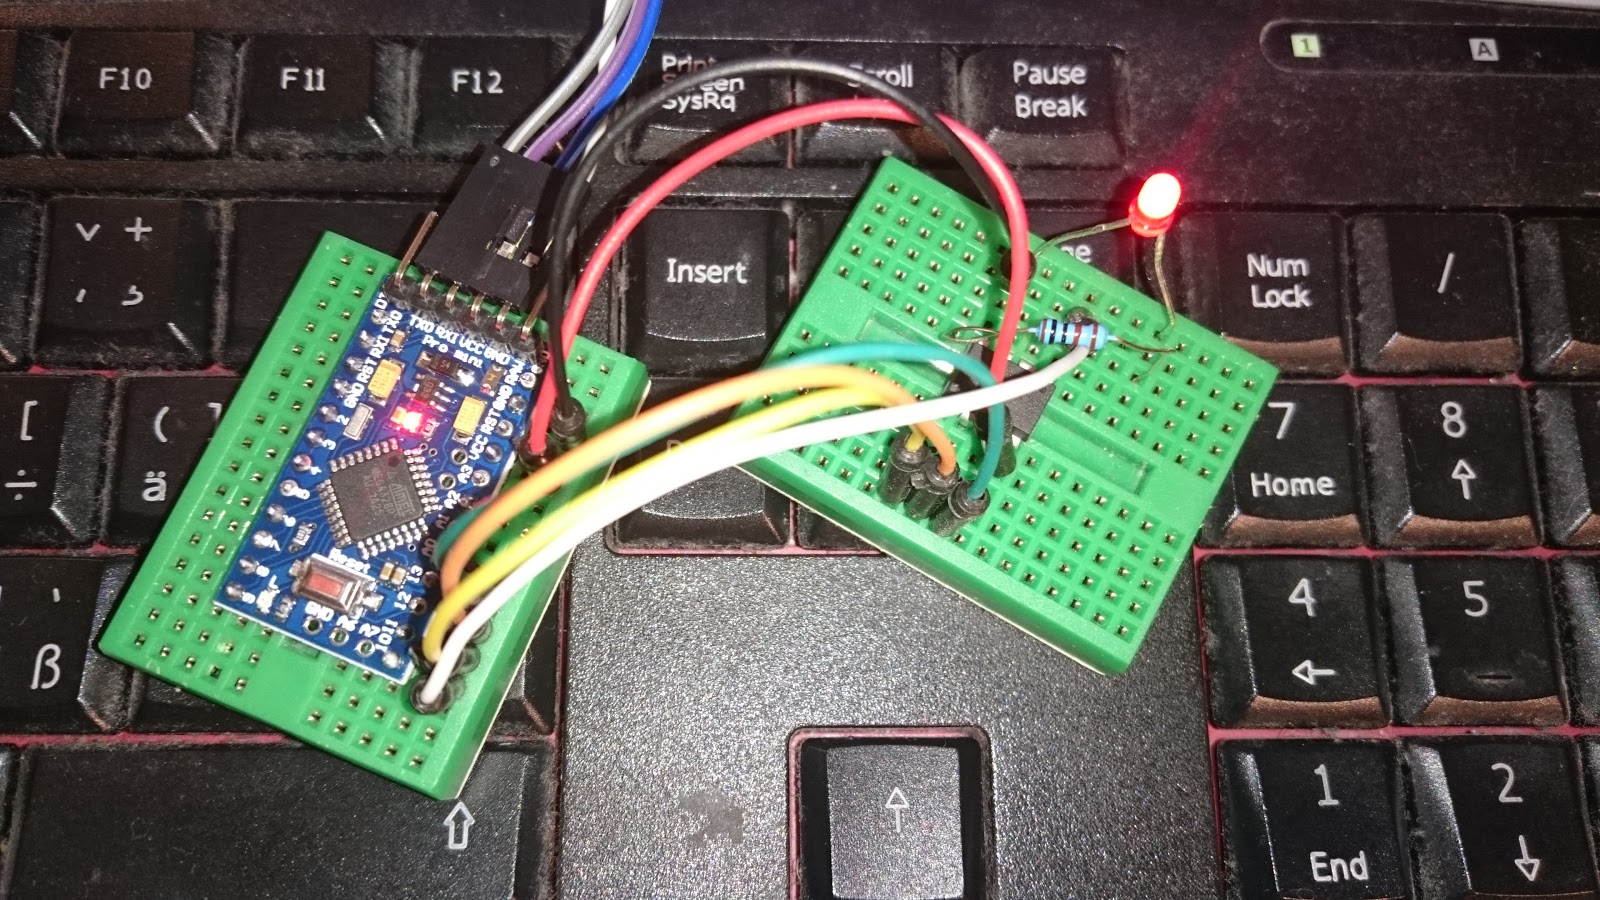
There is quite uses full post describing the wiring of arduino UNO with ATtiny13A. LED with resistor is added to test the basic blink test from Arduino IDE.
I have used Arduino UNO compatible board and later also Arduino Pro mini 3.3V.
 |
 |
 |
 |
Setting-up Arduino IDE
The Arduino IDE can be configured to program a variety of microcontrollers, not just the ones found on the standard Arduino boards. I’m using Arduino IDE 1.0.5 and some configuration is required to use it for ATtiny13A.
Unzip tha Attiny configurations file into the directory (zip file from this post):
.arduino-1.0.5hardware
So hardware folder now contains folder attiny13 with unzipped folders and files.
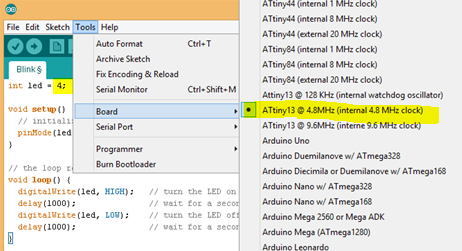
Start the Arduino IDE and there should be new options of ATtiny13 available under the Tools->board menu.

Note for Arduino 1.6.x
In Arduino 1.6.x, you can install the ATtiny support using the built-in boards manager. At this time there is only ATtiny44/45/84/85 chips. Check this arduino page if ATtiny13 is still not directly supported. If it is supported just add the URL to text field in File->Preferences.
![]()
The URL for ATtiny44/45/84/85:
https://raw.githubusercontent.com/damellis/attiny/ide-1.6.x-boards-manager/package_damellis_attiny_index.json
Using an Arduino board as an AVR ISP (In-System Programmer)
Arduino IDE already contains the program that needs to be loaded to Arduino board, so then it acts the programmer for other boards. Open the ArduinoISP sketch from the File->Examples

Configure Bard type to Arduino UNO (or the board type that will be use as programmer), select the correct Serial Port and Upload the sketch as any other sketch to Arduino board.
At this point Aruduino board is prepared to be programmer for other microcontrolers.
Uploading the sketch to ATtyni13A
Finally we are ready for to upload the sketch. For the simple test just open Blink sketch from in Arduino IDe.
File->Examples->Basics->Blink
Only change the LED pin 13 to 4 and the sketch is ready to be uploaded to ATtiny chip.
int led = 4;
void setup() {
// initialize the digital pin as an output.
pinMode(led, OUTPUT);
}
// the loop routine runs over and over again forever:
void loop() {
digitalWrite(led, HIGH);   // turn the LED on (HIGH is the voltage level)
delay(1000);               // wait for a second
digitalWrite(led, LOW);    // turn the LED off by making the voltage LOW
delay(1000);               // wait for a second
}
To upload the sketch to ATtiny13A via Arduino board, select the ATtiny13 board.
Then just upload the sketch via File->Upload Using Programmer menu.

Done!
The LED should blink accroding to sketch and ATtiny13A is ready to be programmed for all other ideas.
In the next post I descriped a sketch that minimizes power needs of ATtiny13A to 0.005mA during the sleep mode!

You can program attiny using breadboard or simple use this shield its very simple https://www.htlinux.com/product/attiny-isp-shield/