I was inspired by several DIY projects. The ESP8266 WiFi 802.11 b/g/n Module is a self contained SOC with integrated TCP/IP protocol stack that can give any microcontroller access to your WiFi network. The ESP8266 is capable of either hosting an application or offloading all Wi-Fi networking functions from another application processor.
This post describes step-by-steps instructions on how to program ESP-01 board in the following chapters:
- HW Setup
- SW Setup (Arduino IDE)
- Uploading a programm to ESP8266
Check also my my ESP8266 projects where I used this ESP-01 programmer:
- IoT ESP8266 temperature humidity sensor project
- Battery powered IoT – DHT22 sensor
- Battery powered IoT – door sensor
From all the ESP8266 board family I chose ESP01.
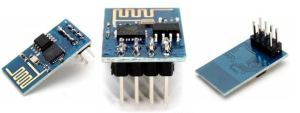
HW setup
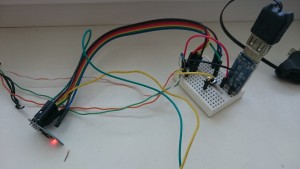
You have simple option to just connect you ESP01 with cables:
The other way is to buy or create a programming board
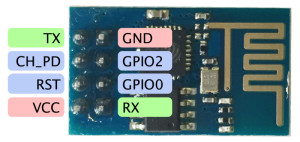
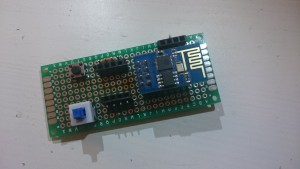
ESP pin out is quite simple. To make developing with the ESP-01 module easier, I created a basic development board. It provides double access to all individual pins, has button for flashing mode (GPIO00) and CH_PD is enabled by default. It offers a button for reset and also separate header for TTL-USB Converter.
Pin out and photos of new board in progress:
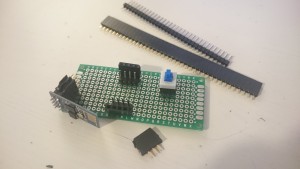
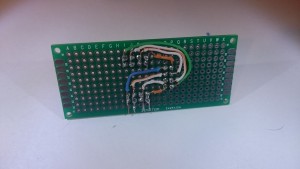
Final ESP01 development/programming board:
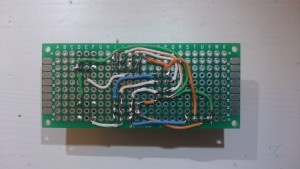
Other development board that inspired me: tim.jagenberg.info/2015/01/18/low-power-esp8266/
SW setup (Arduino IDE)
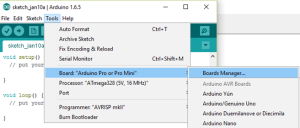
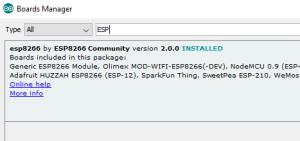
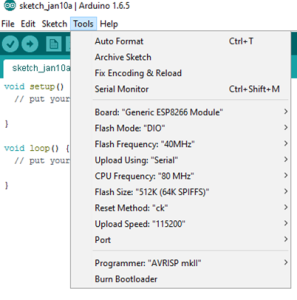
As I’m used to Arduino IDE, I installed ESP boards following the instractions in https://github.com/esp8266/Arduino:
- Install Arduino 1.6.5 from the Arduino website. NOTE: higher versions do NOT work. (as of Jan 2016)
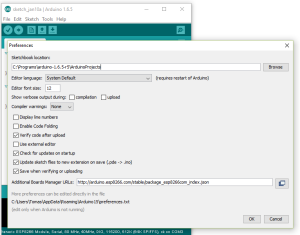
- Start Arduino and open Preferences window.
- Enter
http://arduino.esp8266.com/stable/package_esp8266com_index.jsoninto Additional Board Manager URLs field. You can add multiple URLs, separating them with commas.
Uploading to the ESP8266
To upload your compiled program to the ESP8266:
- Disconnect power to the ESP
- Bring GPIO0 to ground (turn on switch button on the board) – ESP starts in uploading mode.
- Power up the ESP (press the restart button on the board)
- Release the pushbutton
- Click the play button in Arduino IDE (right arrow icon) to upload the program
When it works, you should see the tiny blue light on the ESP-01 module flashing and the following display on the Arduino IDE.
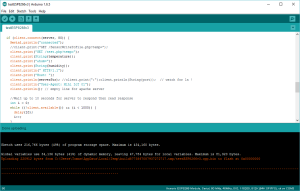
Done. Now I can easily upload any program to ESP8266 ESP-01 board. 😎
Check my my first IoT ESP8266 temperature humidity sensor project.
Complications
- My first attempt to connect to the ESP (without the board) was not successful. I have forgoten to connect CH_PD with VCC.
- ESP8826 was continuously restarting with the following messages:
ets Jan  8 2013,rst cause:4, boot mode:(3,7)

wdt reset
load 0x40100000, len 816, room 16
tail 0
chksum 0x8d
load 0x3ffe8000, len 788, room 8
tail 12
chksum 0xcf
ho 0 tail 12 room 4
load 0x3ffe8314, len 288, room 12
tail 4
chksum 0xcf
csum 0xcf

2nd boot version : 1.2
  SPI Speed      : 40MHz
  SPI Mode       : QIO
  SPI Flash Size : 4Mbit
jump to run user1

sdŽC˙
Ai-Thinker Technology Co. Ltd.

invalid
I have changed the power source to the better one and problems are gone. 😎
References:
learn.adafruit.com/esp8266-temperature-slash-humidity-webserver
https://github.com/esp8266/Arduino
tzapu.com/minimalist-battery-powered-esp8266-wifi-temperature-logger/
www.esp8266.com/wiki/doku.php?id=esp8266-module-family
lantaukwcounter.blogspot.sk/2015/05/programming-esp8266-with-arduino-ide.html


